Create experiences that leave you in awe, for these will be the highlights of your life. ~Ryan Blair
Showing posts with label string quilts. Show all posts

Tuesday, June 30, 2015

Flower Show Block

JULY...
Here comes the final block in this block of the month series....

This time of year, signals the onset of summer activities; and finally the kids are finished their school year. So what are you going to do with all that time? 

If you're a quilter, there is an endless supply of quilting projects to find online these days; and deciding where to focus your creative energy can be overwhelming. However, if time is of short supply for sewing, why not try this mini block for JULY to signify those special times spent out in the garden!


*  *  *  *  *  *  *  *  *

If your sewing/quilting time is limited, you can still download this block pattern FREE* during the month of July and save it for making on a rainy day. 

And for more FREE creative blocks, there are:  
BLUE MOON, IS THERE COFFEE?, and OH...LOLLIPOP! 

However, the free offer on these three blocks will soon be disappearing sometime in July. Please visit soon.... to find them; and the rest of the block series.

*
Please do not make copies of these block designs to give to your friends; instead share this page or ask them to go to the website to download their own patterns. :)

For any more instruction to prepare the block, please visit my Craftsy page for the PDF pattern (available usually within a few days of this posting). 


*  *  *  *  *  *  *  *  *


FABRIC SELECTION

6.) BLUE and PURPLE

I have chosen my blue-purple block to embellish for my sixth (and final) quilt block in this series. This color theme fit well with my chosen theme. 

The stitch that holds the front and batting was done with a leaf design. Now it fits well with the flower appliques that have been used for this month's block.

BLUE-PURPLE BLOCK (Front)
            
BLUE-PURPLE BLOCK (Back)


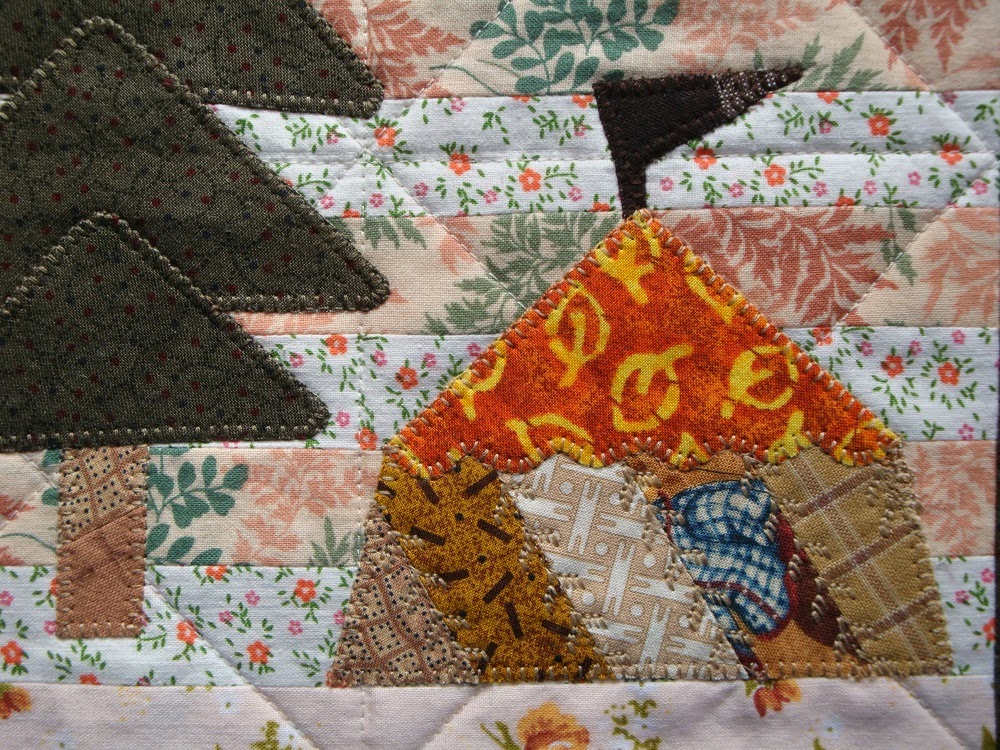
THE BLOCK - Creative Flowers

Many quilters love using flowers in their quilts; and thus, I have ended up selecting a flower theme for this block. To come up with this design, I looked through my applique scraps for inspiration. I tend to accumulate leftover appliques when designing quilts; and figured it was time to see if any would be useful for this block.

To come up with a name for this block, I thought about how much fun participants have when entering items into a fall fair in their local area for display, and winning ribbons. So if you have any leftovers that would work for this block, add your own creativity to make your own unique block.

So go ahead.... and put together a winning entry for this month's block. Use the pattern as is; or embellish it to suit your own creative style!


THE FINISHED BLOCK

FLOWER SHOW BLOCK

This block may be added to the others and joined into a larger quilt once all my blocks are completed. Or finished as a mini quilt all on its own!

I will select some blocks to show how to join them; and this will be available sometime this summer. It will also be included in the pattern that will contain all of my blocks in this series.


************************
Enjoy this project... and find the pattern soon at my Craftsy store page, where all applique templates will be included. FLOWER SHOW will be available to download for free for the month of July 2015

Although this means that the previous month's block: Sail Away will no longer be available for free. All templates will be available together in one pattern, once the series has run its course. Each new block will replace the previous one until all blocks have been posted. 


Happy piecing...

Sunday, May 31, 2015

Sailing Away Block

JUNE...
Holiday time is coming... can it really be here!!

That time of year when being active doesn't mean layers and layers of clothing just to keep warm. But now, opportunity to cool off! Water is where many people enjoy their summers, and why not try this block for JUNE to signify those special days.


PLEASE NOTE:
For any more instruction to prepare the block, please visit my Craftsy page for the PDF pattern (available usually within a few days of this posting). These three blocks that will remain free for the duration of this series: BLUE MOON, IS THERE COFFEE?, and OH...LOLLIPOP!


FABRIC SELECTION

5.) BLUES

I have chosen my blue block to embellish for my fifth quilt block in this series. This color theme fits perfectly with the water theme that dominates our summer activities. 

Because we are thinking of water, why not add machine stitching using a wave stitch along the strips. Be careful that you don't stretch the block out of shape.  


BLUE BLOCK - FRONT

BLUE BLOCK - BACK


BLOCK APPLIQUES -- SAILBOAT

Even our scraps can produce a colorful section once selected and sewn together to create this delightful sailboat. Whether your memories are of toy boats from your childhood or real adventures on the ocean, have fun selecting your fabric strips to create this appliqued block.


CONSTRUCTION OF THE APPLIQUE

A.) Instead of using fabric, why not use Rattail satin cord (2mm) to create the mast. Here I've used two pieces cut from a 12" length and stitched separately using a zigzag stitch to fasten each down. 

B.) Before stitching, place the sailboat on the block to place the cord in the proper location. Once it is stitched, replace the sailboat pieces; and fuse and stitch them in place. 

THE MAST

THE FLAG


THE FINISHED BLOCK

SAIL AWAY BLOCK


This block may be added to the others and joined into a larger quilt once all my blocks are completed. That process will be featured soon.


************************
Enjoy this project... and find the pattern soon at my Craftsy store page, where all applique templates will be included. SAIL AWAY will be available to download for free for the month of June 2015

Although this means that the previous month's block: Outdoor Adventure will no longer be available for free. All templates will be available together in one pattern, once the series has run its course. Each new block will replace the previous one until all blocks have been posted. 


Happy piecing...


Thursday, April 30, 2015

Outdoor Adventure Block

May 2015...Getting there. Spring heading towards summer....

Time to....
     enjoy planning-planting the garden, 
          taking a trip to the lake on the long weekend, 
               or just an outdoor excursion on the weekends through the countryside. 

Anyway, you enjoy this time of year...
     it's time for the next design for
MAY that is inspired by the change of seasonal activities.


PLEASE NOTE:
For any more instruction to prepare the block, please visit my Craftsy page for the PDF pattern (available usually within a few days of this posting). The three other blocks that will remain free for the duration of this series are:
BLUE MOON, IS THERE COFFEE?, and OH...LOLLIPOP!


FABRIC SELECTION

4.) ORANGES

I have chosen my light orange block to embellish for my fourth quilt block in this series. This color theme works fine with this applique design. Not really very much color in the outdoors, yet the grass is greening up; and the planning of the gardening season is underway. 

FRONT OF BLOCK
BACK OF BLOCK

These blocks can be made from scrap fabrics and scrap batting pieces. Making these blocks economical and easy to construct; and perhaps giving you opportunity to learn some new skills in the process.


BLOCK APPLIQUES

A) SIMPLE TREES
These triangles are easy to make if you begin with a square; and then cut each square into two triangles. For the top three triangles use a 4" square; and for the bottom triangle use a 3.5" square. 

Cut these out of fabric or create a more colorful triangle by using pieced strings. If using strings you can first cut squares out of paper to find the size necessary for the triangle shapes. 

TREES

B) THE TENT
The tent can be made from existing scraps or cut from pieced strips constructed from the fabric colors you select. Add fancy or decorative stitching to the tent to embellish it, if desired. The flag and flag pole are cut from scraps.


TENT

My block posted here will not be finished with a binding, as I wish to consider combining several of these blocks into a larger project, that I will share once all my blocks have been stitched. 

OUTDOOR ADVENTURE Block


************************
Enjoy this project... and find the pattern soon at my Craftsy store page, where all applique templates will be included. OUTDOOR ADVENTURE will be available to download for free for the month of May 2015

Although this means that the previous month's block: Country Cabin will no longer be available for free. All templates will be available together in one pattern, once the series has run its course. Each new block will replace the previous one until all blocks have been posted. 


Happy piecing...


Saturday, February 28, 2015

Flower Patch

March 2015.... Waiting for Spring 

Are you ready for the next block in this Pieced Strings Series for 2015...! 

I had some time to reflect on what designs I'd try; and have had opportunity to made up a few. So there is no waiting for another month to pass, before sharing the next one with you. 

Therefore, here's my flower inspired block for MARCHFor anyone that has downloaded the block: "Oh.. Lollipop!" or seen it on my blog will recognize its shape. You'll be able to use this same template piece to create the main flowers. The pattern with all the templates should be available in a few days, after this entry has been posted.

Plus, I am tired of looking out the window at fields of snow; and flowers are always so uplifting, aren't they? So let's make some flowers.... 


CREATING THE DESIGN

Instructions for preparing the blocks using narrow fabric strings, are shown in these projects, available on my Craftsy page:
BLUE MOON
IS THERE COFFEE?
OH.. LOLLIPOP!

Please note: I will not be repeating the instructions to make this block in detail, here on the blog, as these will be available for free download, to compliment this series.  (Find the links on the right-hand column of this blog.)


++++++++++++++++++++++++++++++++++++++++++++++++++++++


2.) YELLOWS, GOLDS

I have chosen my yellow block to embellish for my second quilt block in this series. This color theme fits the longer, more sunnier days of the end of winter, perfect for the month of MARCH.


YELLOW BLOCK -- FRONT

YELLOW BLOCK -- BACK

JOINING THE TOP AND BATTING

To keep the strings from shifting too much, in the process of making the block, I added the batting layer to the wrong side of the top fabric piece. 

By using straight lines of stitching, both layers are held in place without the use of safety pins or temporary adhesive spray. Pins can be used if desired. On this block, I stitched a series of three squares near the center of the block.

You will also note, that the batting layer was made from scrap pieces of batting. The best stitch to join these scraps is the three-step zigzag stitch, it does not pull the pieces together to create a ridge like a regular zigzag stitch does. (The three-step stitch makes three stitches for each part of the zigzag.) The regular zigzag stitch doesn't affect the batting negatively; however, it does make both pieces join neater if you can use the three-step zigzag stitch. You can see the difference in the photo above. 


THE APPLIQUES

Next step, is to prepare the templates for the applique design. The templates will be available in the pattern, as soon as it is ready on my Craftsy page. However, you may begin by making the pieced block and using the flower shape from the "OH.. LOLLIPOP!! block.

Flowers
To create the flower patch block, use the flower design and embellish it with either a fabric center or some fancy and colorful buttons.

FLOWER CENTERS -- BUTTONS


Stems
One thing about appliqued flowers that may be time consuming; or perhaps frustrating, is the process of working with long, narrow strips of fabric. They can be tedious to prepare and cut out; as well as, sometimes they just don't stitch down as perfectly, as one would like. (Although, that may be either because the fabric frays too easily or the fusible web hasn't adhered properly to the fabric.)

Therefore, here's an option for you, to try in this design. Instead of using fabric, create the stems using rat tail satin cord (2 mm cord shown below) and stitch it down with a zigzag stitch. It's very quick and the cut ends are covered with the flower at the top and the leaves at the bottom. (You may use ribbon or yarns if you don't have satin cord, as shown.)

FLOWER STEMS -- RAT TAIL CORD

Leaves
To fill in the background with more color and help balance out the design, let's use a special placement of brightly colored leaves. 

Another note... do not worry too much about where the stems are placed; as in my layout, I had only one stem in the center and this was not covered with leaves. Therefore, I added the two small flowers at the center of this area. These came from my applique leftovers, from a previous project. The pattern will provide these flowers for you. Or you may add more leaves, if desired.  

LEAVES AND SMALL FLOWERS


MY VERSION

I love buttons; however, and in this case, I decided to use fabric centers for the flowers. And once, I had chosen the dark brown for the flower centers that matched the color of the stems, I knew that was what I wanted to use.

FLOWER PATCH BLOCK

My small flowers, at the bottom of the design were leftovers from another project, and this is also another way to add uniqueness to a project. 

The larger leaves and white flowers were cut from pieced fabric strings; and these certainly add extra dimension to the design. 

Have fun joining fabrics together to get some very unexpected results; as sometimes it is colors that one wouldn't think go well together; that actually look beautiful in a finished applique design. And using fabric strips is a great way to use up your scrap fabrics and create pretty quilt blocks.

My block posted here will not be finished with a binding, as I wish to consider combining several of these blocks into larger projects. And share this will you at a later date.


WALL-HANGING FROM THESE BLOCKS

Beginning with this block, I will only be stitching together the top and batting layers. Later I will show you how to add sashing to join these blocks; and how to prepare it to add the backing layer. This can be finished as is; or I may consider adding a unique border.

************************
Enjoy this project... and find the pattern soon at my Craftsy store page, where all applique templates will be included. FLOWER PATCH will be available to download for free for the month of March 2015

Although this means that the previous month's block: Chocolate Hearts will no longer be available for free. All templates will be available together in one pattern, once the series has run its course. Each new block will replace the previous one until all blocks have been posted. 


Happy piecing...


Saturday, January 31, 2015

Chocolate Hearts

February 2015.... Heart Month

Here begins my new Pieced Strings Series for the New Year... After having fun creating these mini quilt blocks (last year) using pieced strings from my fabric stash; I am ready to embellish the blocks.

Instructions for preparing the blocks using narrow fabric strings, are also shown in these projects, available on my Craftsy page:
BLUE MOON
IS THERE COFFEE?
OH.. LOLLIPOP!

I will not be repeating that portion of the mini quilt, here on the blog, as these will be available for free download, to compliment this series.  (Find the links on the right-hand column of this blog.)

++++++++++++++++++++++++++++++++++++++++++++++++++++++

1.) PINKS, REDS, WHITES

I have chosen my pink block to embellish for my first mini quilt project in this series. I felt this color theme fit perfectly with the month of FEBRUARY.

PINK BLOCK -- FRONT

PINK BLOCK -- BACK

To help hold the strings from shifting too much, I added the batting layer to the wrong side of the top fabric piece; and then, added some stitched lines. To add the lines on this pink block, I used an asterisk shape. Next step, is to prepare the templates for the applique design.


MAKING YOUR TEMPLATES
To make your heart templates, use a small piece of paper, and fold it in half. Then cut out your hearts in a variety of sizes. Trim them, until you have the shape and sizes, you desire.

In the following photo, the hearts shown are in three sizes:  Measurements are across the widest part (from side to side only). Large: (4.5"); Medium: (2.5"); Small: (2")

Make your hearts in the sizes you desire for your quilt block. Use as many or as few as desired.

PAPER TEMPLATES -- HEARTS

Now that your heart templates are made, you will need to decide what type of fabric you will use for each of them. As we are focused on using fabric scraps, why not try one of these options:

1.) FABRIC STRIPS: 
Sew together several strips of fabric until they are wide enough to use for your hearts.

2.) SCRAPPY FABRICS: 
Use fabric scraps and stitch together enough pieces to make unique scrappy hearts.

3.) WHITE FABRIC: 
Start with a square of fabric and cover it with fancy stitching, in two or more thread colors. Fuse or pin a piece of medium-weight interfacing to the wrong side of the fabric piece before starting to add the stitches. Then cut out your hearts from this embellished fabric.


=============================================
Now, what could be better then adding hearts to this mini quilt done in browns to remind us of yummy chocolate hearts that are everywhere as Valentine's Day approaches.

The BEST THING about these chocolate hearts is that they are CALORIE-FREE!! 

=============================================


MY VERSION:

I really wanted to experiment with embellishing a fabric square with fancy machine stitching to see what it looked like; and it was pretty. However, since my background block was not well suited to hearts made from these squares; I had to rethink my design.

EMBELLISHING WITH FANCY STITCHING

So if you need to use another color, why not chocolate brown? They really did pop when placed on the pink background; and I was happy to try out an optional layout.

MY CHOCOLATE HEARTS

Since, I had to rethink what applique design would really work on my chosen block, I thought adding another element would really bring out my new design. Thus, I constructed an envelope template to add to the block. Sew together several strips to make your envelope fabric and cut out when ready.


ENVELOPE TEMPLATE
To make the envelope template, find a paper envelope; and open it up to see the shape you'll need to draw out, if needed. My envelope is 4 1/4" wide from side to side; and from the bottom edge to top tip is: 4" high. (Make sure you add an extra allowance to the envelope flap, (bottom edge of flap) so it can be placed correctly underneath the bottom section of the envelope.)


PLACEMENT OF ENVELOPE FLAP


QUILT BLOCK CONSTRUCTION

Once the templates are prepared; trace shapes onto the paper-side of the fusible web. Then iron to your chosen fabrics and cut out around each template. Position them on the quilt block and when happy with the arrangement, fuse them in place.

Machine (or hand) stitch around each applique. I added a fancy stitch along the seam lines on the outside portion of the envelope for added embellishment. Thread colors used matched the fabric colors on this project.

To fasten the backing fabric layer to the batting/top fabric layer, stitch around the applique design, through all three layers. Add any other stitching, as desired. (You may use temporary spray or pins to hold the layers together, while you add the stitching.)

Prepare the binding and add to the quilt block. I will not be showing that step, at this time; as I wish to consider combining several of these blocks into larger projects. These will be determined later.

CHOCOLATE HEARTS QUILT BLOCK

A pattern will be placed on my Craftsy page, when it is ready. (Templates will be included in the pattern.)


+++++++++++++++++++++++++++++++++++++++++++++


So what I have decided to do, is this:
2015 SERIES OBJECTIVES
  1. PROVIDE an instructions only tutorial (no templates) on this blog. 
  2. IF YOU would prefer to download a pattern that includes the applique templates, I plan to post a complete pattern on my Craftsy page. (Each pattern will be available for a FREE download once it is posted; and only for the duration of that month.)
  3. PATTERN will be available to purchase as a single pattern; once that month is over, for anyone that missed out. However, the blog post will remain available, if you choose to draw out your own templates for the project.
  4. ONCE this series has run its course, I plan to also provide a 'templates only pattern' available for purchase to include the complete series of templates.
  5. PLAN TO provide at least six new applique designs for this series, in this calendar year.
  6. BLOG entry will include photos and instructions to embellish the mini quilt block.  
  7. FINISHING of each of these blocks is up to you. I will be leaving the binding until later... (so as to explore other possibilities in using these blocks.) 


Happy Stitching!!